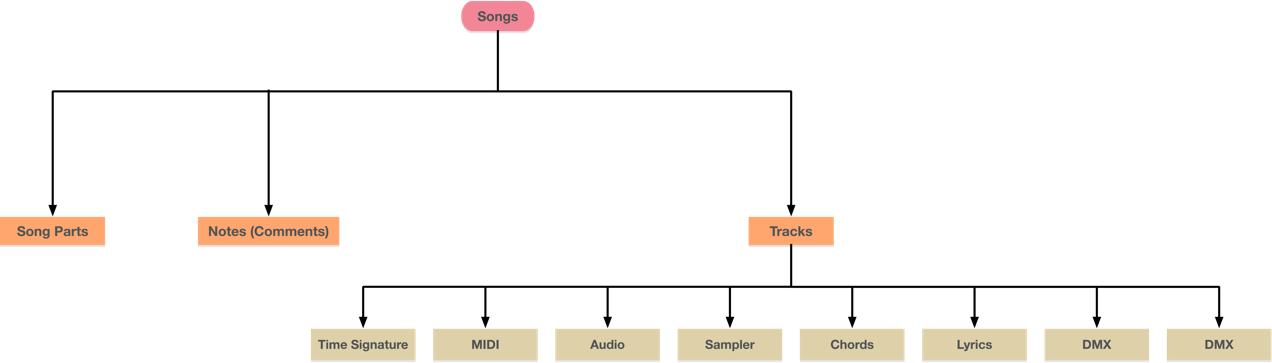
Tracks🔗
Tracks can provide audio, visual and informational accompaniment while you perform. They can also automate, direct, synchronize and record your show.
Each Track is a collection of Events scheduled to occur at a specific time. Different types of Events belong to different types of Tracks.
Hierarchy🔗
In VST Live, Tracks are elements of a Song. As with a DAW, the playback of Tracks is controlled by the system’s Transport. Parts are also elements of Songs, and function independently of Tracks.
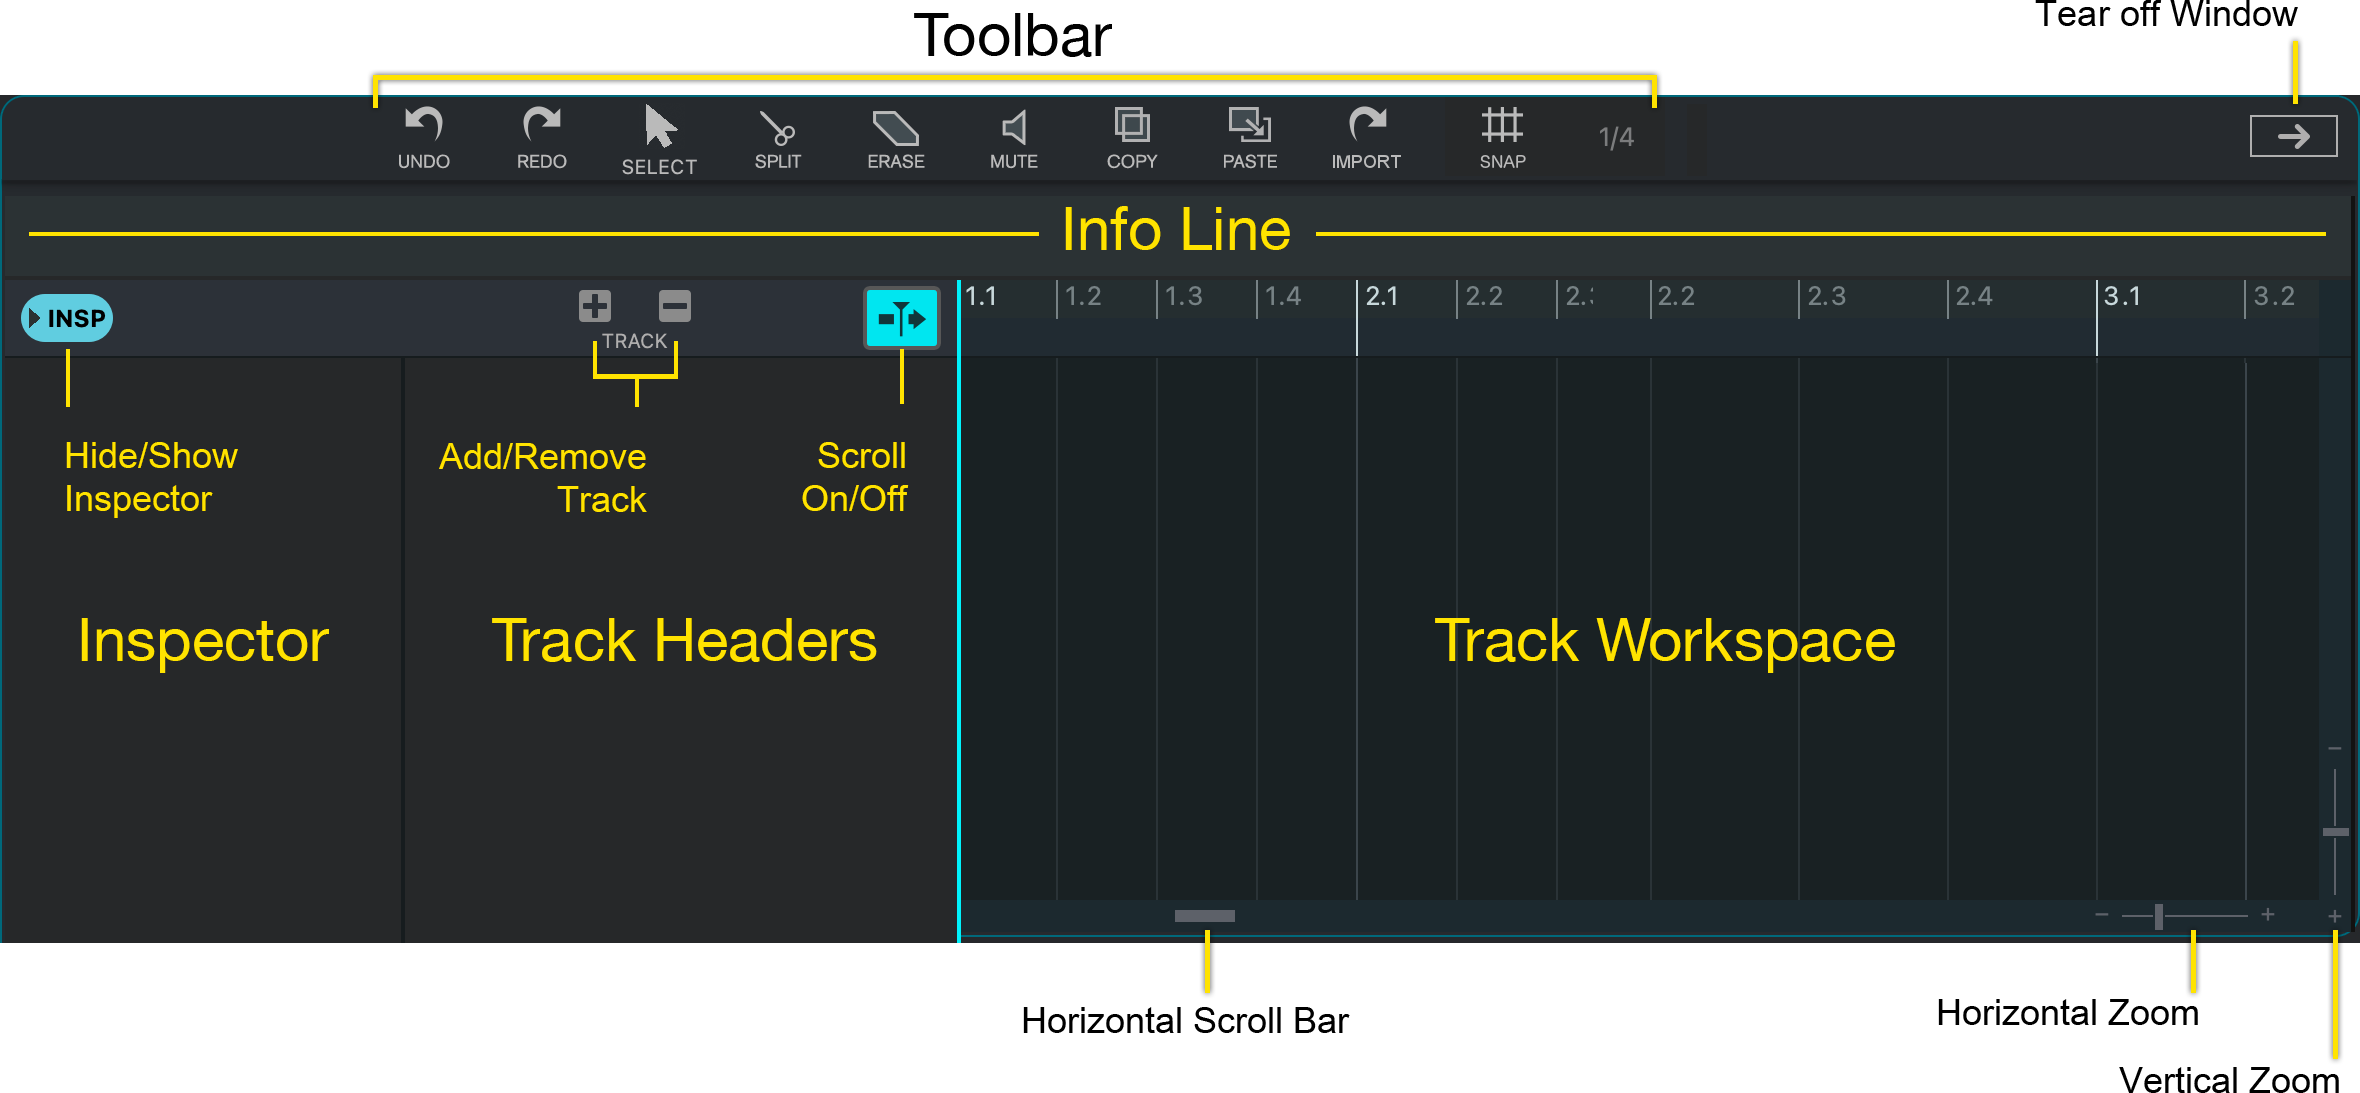
Interface🔗
If you have used a DAW, you will feel right at home with VST Live’s Tracks interface. Tracks are listed from top to bottom in the track list and extend horizontally across the Project Zone.
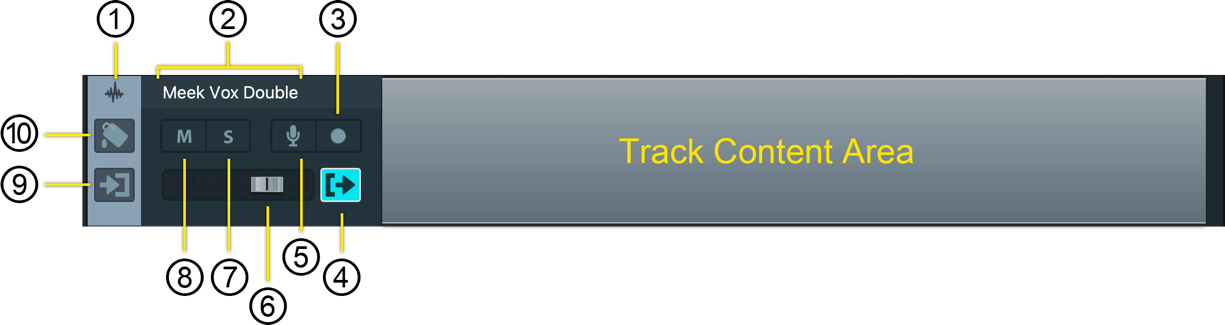
Track Headers🔗
Track Headers provide a consistent interface for the control of tracks, regardless of their type or content. Interface elements are only shown for tracks which support that specific feature.
To select a Track, click on its Track Header.
Regardless of the Track Event tool currently selected, the cursor will become an arrow when placed over a Track Header.
- Track Type Icon
The icon here represents the Track type.
- Track Name
The Track name is displayed in this field. To change the name, double-click on the name field, type the new name, and then press Return.
- Track Recording Arm State
Clicking this icon toggles the Track’s state between recording-armed and playback. This armed stage must be set for the Track to record.

As per recording convention, the icon is bright red when armed.
- Channel Output
The output of Tracks can be sent to a specific destination based on the Track’s type. It is also possible to specify no connection, which disconnects its output from the VST Live system.
Disconnected tracks will continue to process incoming (or side-chained) data.
To set the Track’s output, click the Channel Output icon; a drop-down menu will appear:
- To set the output destination you wish, choose it from the menu. The Channel Output icon will illuminate to indicate it is active.
- To disconnect the Track’s output from VST Live, choose “nc” (not connected). The Channel Output icon will dim to indicate it is inactive.
- Recording Monitor State
Clicking this icon toggles the Track’s monitoring state. Monitoring states apply to two types of Tracks: Audio and MIDI.

To monitor the Track’s input while recording is engaged, activate the recording monitor state. The icon will become orange to indicate this monitoring is active.
Data monitored through a recording channel will be delayed by audio system’s latency.
- Track Output Level
Adjust this fader to change the Track’s output level.
- Track Solo
Soloing a Track mutes all others, except for other soloed Tracks. Soloing Tracks is cumulative; each new Track that is soloed is added to the Tracks that are heard.

Click the solo icon to solo a Track; the illuminated state denotes solo is active.
Soloing a muted Track will have the effect unmuting and then soloing it.
- Track Mute
Muting a Track temporarily silences its output (until it is unmuted). Muting Tracks is cumulative; each new Track that is muted is added to the Tracks that are muted.

Click a Track’s Mute icon to mute it; the illuminated state denotes the Track is muted.
Muting a soloed Track will have the effect removing the solo and muting the Track; if no other Tracks are soloed, then solo mode for system is deactivated.
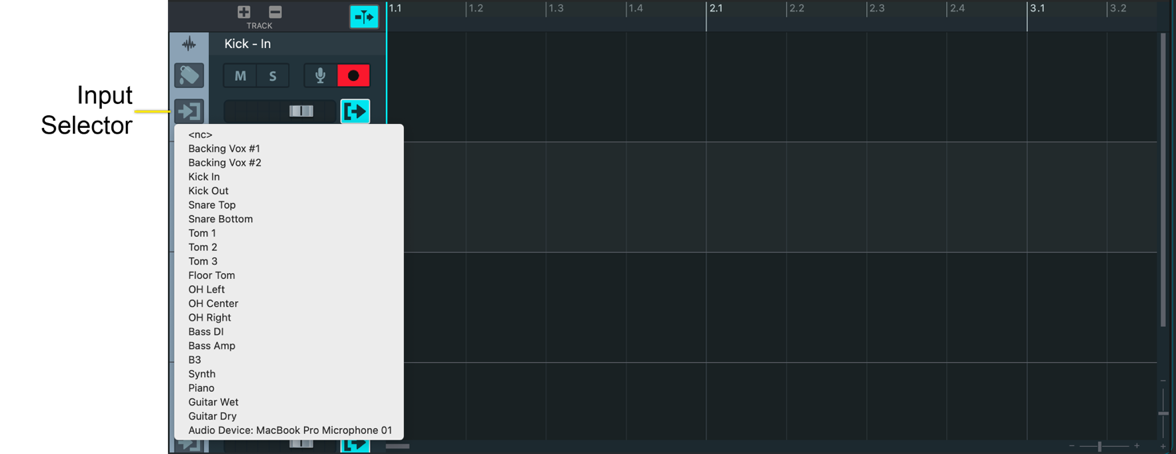
- Channel Input
You can set a Track’s input source with this control. The available input sources are based on the Track type. It is also possible to specify no input (“nc”), shutting off all data to the Track.
Tracks without input sources may continue to use CPU cycles when the Transport is engaged.
To set the Track’s input, click the Channel Input icon; a drop-down menu will appear:
- To set the input source you want, choose it from the menu. The Channel Input icon will illuminate to indicate that the input source is active for this Track.
- To disconnect the Track’s input from VST Live, choose “nc” (no channel). The Channel Input icon will dim to indicate the Track’s input is inactive.
- Track Color
Click this icon to set the Track’s color. Depending on your operating system and configuration, a color palette will appear for you to select from.
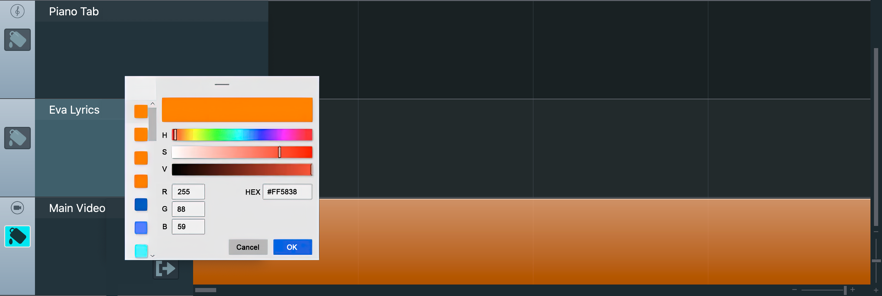
A configured Windows® 10 Color Selector
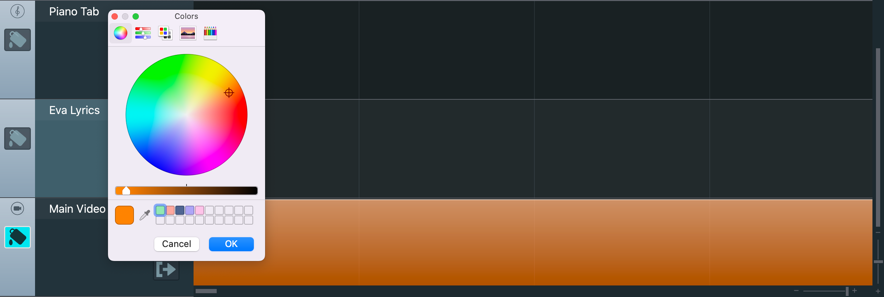
The macOS™ Monterey System Color Selector
Toolbar🔗
Common operations, Track-specific operations, tools and options are available using the icons in the Toolbar.

Operations
The operations available for managing and editing Tracks will be familiar to Cubase users.
Undo

This command steps backwards in your command history for the Tracks Zone, undoing the previous command that you performed.
This is not necessarily the same operation as Edit > Undo; it is the same as Song > Undo. Track commands have their own History Buffer. Commands you perform outside of the Project Zone use the Main History Buffer.
Redo

This command steps forward in your command history for the Tracks Zone, redoing the next command that you performed.
This is not necessarily the same operation as Edit > Redo; it is the same as Song > Redo. Track commands have their own History Buffer. Commands you perform outside of the Project Zone use the Main History Buffer.
Copy

Any Track Event you have selected will be copied to the Clipboard.
Paste

If the contents of the Clipboard are Track Events, and you have selected a Track of that same type, the Clipboard Event data will pasted to the selected Track. If the data is an Event, it will be pasted at the current position of the Transport Bar.
Import

Depending on the Track type you have selected, you can import data (e.g., audio or MIDI files) with this command.
Many media types can also be dragged from your Desktop directly onto the corresponding track.
Tools
Tools in the Track Zone allow you to directly manipulate Track data.
Select

Use this tool to select an event on a Track.
Split

Use this tool to split one Event into two where you click it.
Erase

Use this tool to erase an Event by clicking on it.
Mute

Use this tool to mute an Event by clicking on it.
Options
These options affect the positioning of events on the Timeline.
Snap

If this option is active, horizontal movements of Events are constrained to specific time divisions.
Snap Division

This option sets the time division used if Snap is active.
Info Line🔗
The Info Line shows information about the event you have selected on a Track. The fields of information displayed are based on the type of Track that your selected event is on.
Editing Using the Info Line🔗
You can edit each of the fields on the Info Line, manually. This allows you to input precise values.
- Double-click on the field.
- Type the new value or name
- Press Return.
The value has been changed. If the Event is visible on the Timeline, the changes will be reflected visually on the Track.
Example
An (audio) Event on an audio Track is selected. The Info Line fields are:

Event Name
The name of the clip.
By default, VST Live assigns the name of the file the clip is from.
Start
The starting time of the Event on the Timeline.
End
The ending time of the Event on the Timeline.
This field is automatically updated when you change the Start time, Length or Offset.
Length
The length of the Event.
The length is measured relative to the starting point, not the Timeline itself. This field is automatically updated when you change the end-time.
Fade In
Non-zero values here will create a linear (i.e., straight line) audio fade-in. The duration is the fade-in value.
Fade Out
As with fade in, non-zero values here will create a linear (i.e., straight line) audio fade-out. The duration is likewise the fade-out value.
Offset
The time offset between the Event’s original Start Time, and the current Start Time.
This field is automatically updated when you change the start-time.
Inspector🔗
The Inspector provides additional information and settings for a Track.
Selecting a Track for the Inspector🔗
Selecting a Track will display its properties in this panel, along with additional controls, settings, and parameters displayed in this panel.
- To select a track, click the Track’s Header.
- To close or open the Inspector, click the Hide/Show Inspector icon.
Inspector Areas🔗
Track settings are available in the Inspector, organized in Areas. The types of Areas, and their fields, are dependent on the specific type of Track. Each Area can be opened or closed by clicking the Disclosure Triangle.
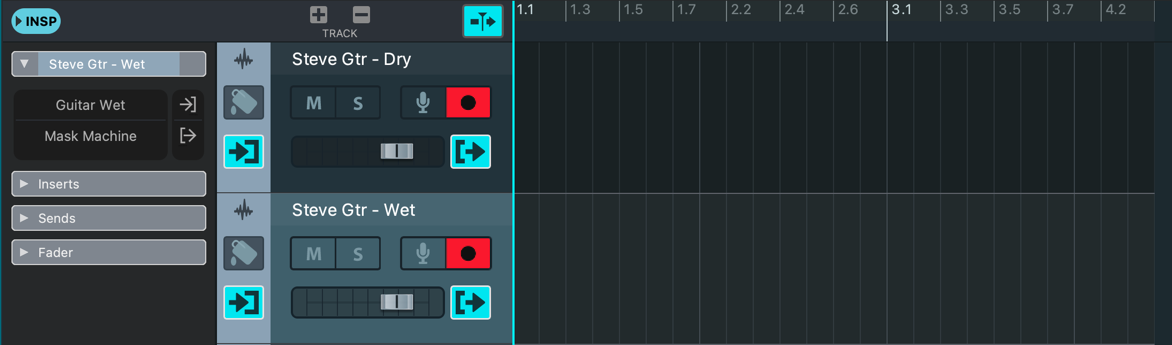
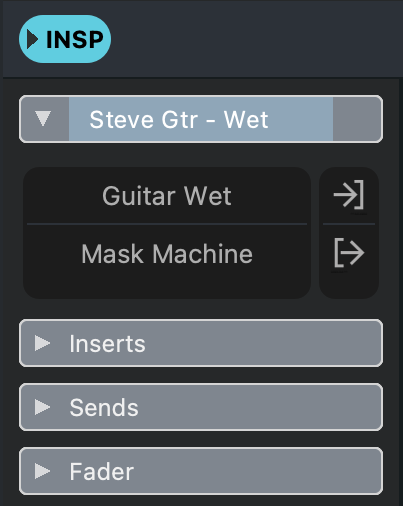
The Track Header for an audio track “Steve Gtr – Wet”
Track Content🔗
This Area displays each Track’s Events.
Visualizing Events🔗
VST Live provides previews when displaying Events. The preview is dependent on the Track type.

A MIDI Event on a MIDI Track. The light bars in the Event are representations of individual notes, their pitches, and durations.
Editing Events🔗
The Track Content area also serves as a canvas for editing and arranging Events.
Many Track types also have their own dedicated editor, accessible as a View. The icons to access these Views are above the Project Zone.
The Info Line
Events, once selected, can be edited with the Info Line. Double-click on a parameter to change it.
Editing Tools
The editing tools from the Toolbar can be used to visually edit Events.
Event Handles
When selected, an Event will show Editing Handles. You can adjust these handles with the Selection tool.
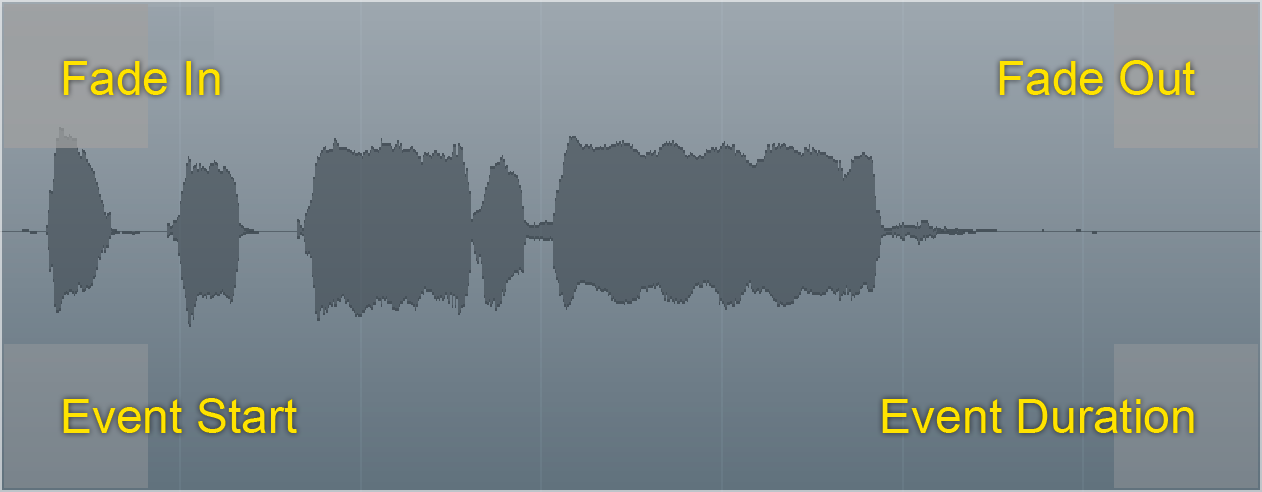
Standard Handles
These handles are common to all Events.
- Event Start.
- Event Duration.
Shared Handles
Some handles are shared by multiple event types.
- Audio, DMX: Fade In.
- Audio, DMX: Fade Out.
Some Tracks have no handles, such as a Folder Track.
Adding/Removing Tracks🔗
These icons add a Track to, or remove a Track from, the selected Song.
Adding a Track🔗
- Click the Plus icon; a menu of Track types will appear.
- Select the type of Track you wish to add.

Removing a Track🔗
- Select the Track by clicking on its Header.
- Click the Minus icon.
Track Types🔗
VST Live’s seven Track types, many of which you will be familiar from DAWs, have been uniquely optimized for live performance.
Each Track type has an icon associated with it in the Track Header.
Audio 🔗

Audio Tracks allow you to import, edit, route, preview, trim, fade, play and schedule audio files.
The output of Audio Tracks is their parent Song’s audio buss. By default, individual Audio Track channels do not appear in the Mixer View; you can access them by extending the Song buss in the Mixer.
Example Usage🔗
- Accompany your performance with pre-recorded audio. Import audio from DAW sessions, extract audio from video files, or record audio directly into VST Live.
- Record all the multitrack audio from your shows.
Inspector Elements
There are four Inspector Areas for Audio Tracks: General, Insert, Sends and Fader:
General
Three are three fields for the General Area:
Track Name
To change the Track name, double click on the Track name, enter the new name, and press Return.
Input
The Track’s input source. Click in the associated black box to view and select from a menu of available inputs.
Output
The Track’s output destination. Clicking in the black box produces a menu of available outputs to view and select from.
Inserts
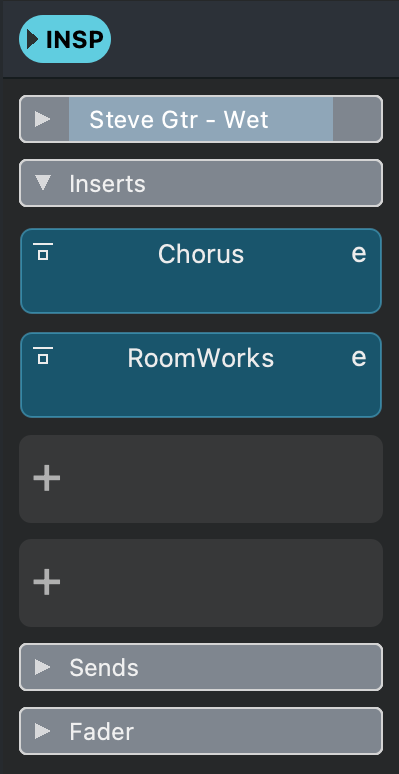
The inserts here provide standard functionality in VST Live.
- To add an insert, click the Plus icon.
- To toggle between bypassing the insert, click the bypass button.
- To launch the plugin editor, click the E icon.
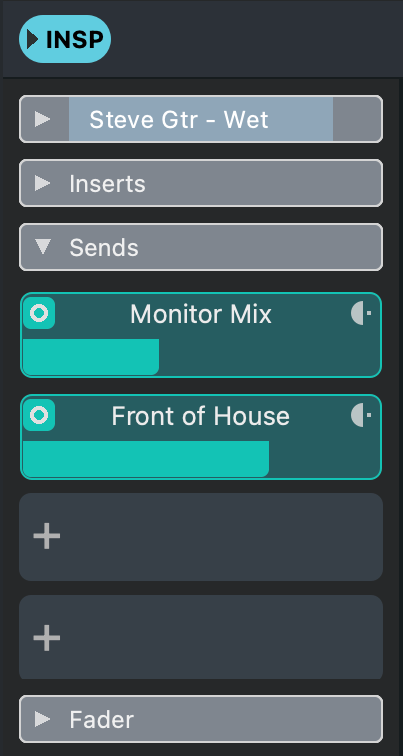
Sends
Track sends can be routed to Stacks, Mixer Groups, a Song buss, or directly to the Mixer’s stereo buss.
- To add a send, click the Plus icon.
- To toggle between bypassing the send, click the Bypass button.
- To toggle between pre/post fader, click the Pre/Post Fader button.
Fader
Audio Track channels each have two faders for the channel’s output.
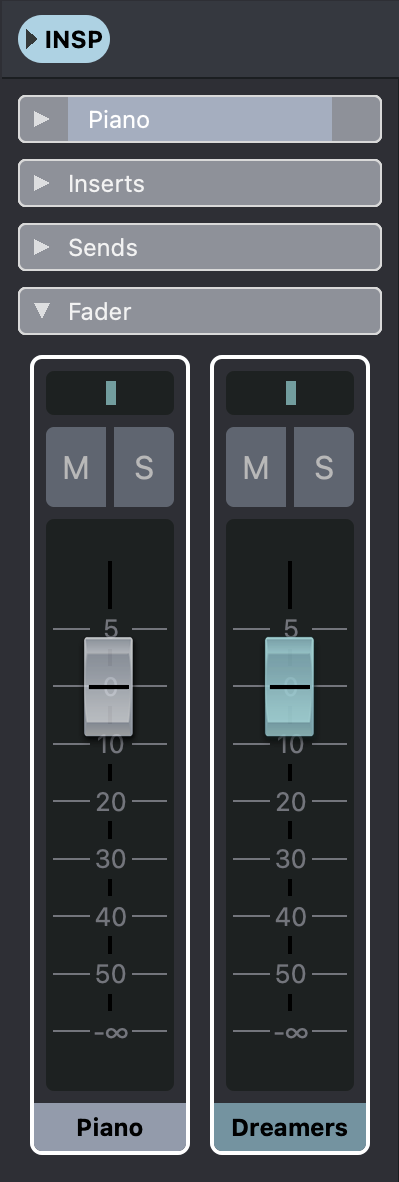
The mute and solo buttons fun`ction within the context of VST Live’s Mixer.
- Left Fader: Controls the amplitude of the selected Audio Track.
- Right Fader: Controls the amplitude of the Track’s destination channel. If the destination is a Song, then this fader will control the amplitude of all Tracks routed to the Song’s Group Channel.
Events
Audio Events appear as regions with waveform previews.

MIDI 🔗

You can use MIDI Tracks for recording and playing back MIDI sequences.
Example Usage
- Accompany your performance with sequenced music for playback on virtual and physical MIDI instruments.
- Automate control parameters with sequenced control changes while you perform. Dynamic operations such as program changes, activating effects and re-assigning hardware controls can all be automated.
- Record all the MIDI performance data from your shows
Inspector Elements
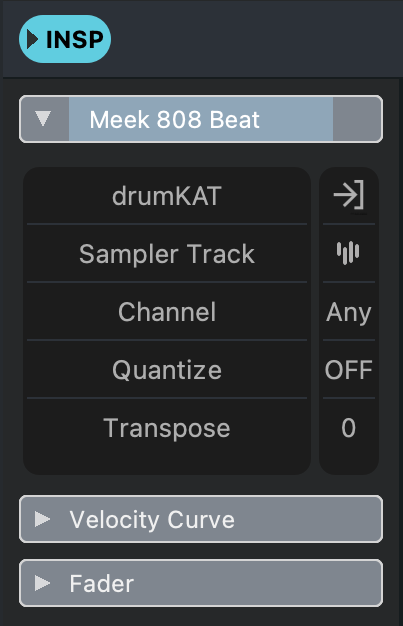
There are three Inspector Areas for MIDI Tracks: General, Velocity Curve and Fader:
General
Three are six fields for the General Area:
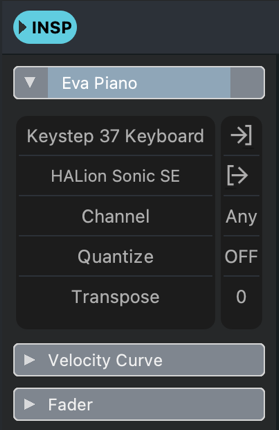
Track Name
To change the Track name, double click on the Track name, enter the new name, and press Return.
Input
The Track’s input source. Click in the associated black box to view and select from a menu of available inputs.
Output
The Track’s output destination. Clicking in the black box produces a menu of available outputs to view and select from.
Channel
When set to channel number, all MIDI data is filtered out except data on the set channel. Set it to “Any” to allow all MIDI data to pass.
Quantize
When active, the timing of incoming MIDI notes is nondestructively quantized. Click the associated black box to view a menu of available quantization values.
Transpose
A non-zero value transposes all outgoing MIDI notes.
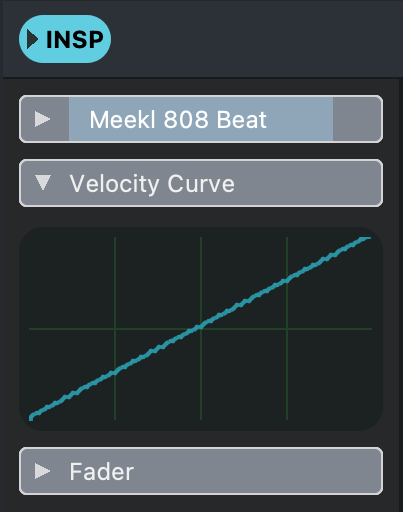
Velocity Curve
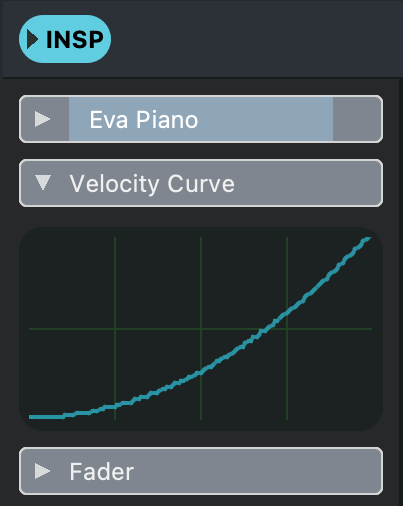
The Velocity Curve maps the velocity of outgoing MIDI notes to the velocity they are recorded at on the MIDI Track. A straight line preserves the incoming velocities.
Fader
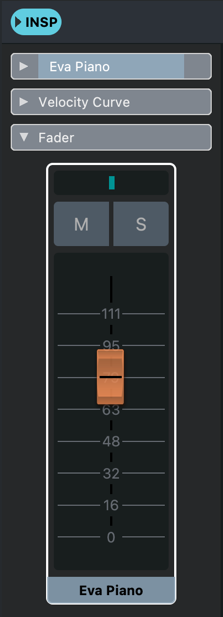
MIDI Tracks are supplied with faders, pan and mute/solo buttons.
Events

MIDI Events appear as regions with note previews.
MIDI Plugins
MIDI Plugins allow you to non-destructively process MIDI data in real-time.
Adding a MIDI plugin
- Select your desired MIDI Track.
- In the Track’s Inspector, open the MIDI Inserts Inspector Area.
- Click the Plus Icon.
- Select your desired MIDI plugin.
Removing a MIDI Plugin
- Select your desired MIDI Track.
- In the Track’s Inspector, open the MIDI Inserts Inspector Area.
- Click on the MIDI Insert.
- Select “<nc>”.
Opening a MIDI Plugin
- Select your desired MIDI Track.
- In the Track’s Inspector, open the MIDI Inserts Inspector Area.
- Click the ‘e’ icon-button.
Toggling a MIDI Plugin Bypass
- Select your desired MIDI Track.
- In the Track’s Inspector, open the MIDI Inserts Inspector Area.
- Click bypass-button (top-left). When the Plugin is bypassed, it will change to a dark colour.
Video 🔗

Video Tracks contain video files as Events.
Example Usage
Project and synch pre-recorded video for your audience.
Inspector Areas
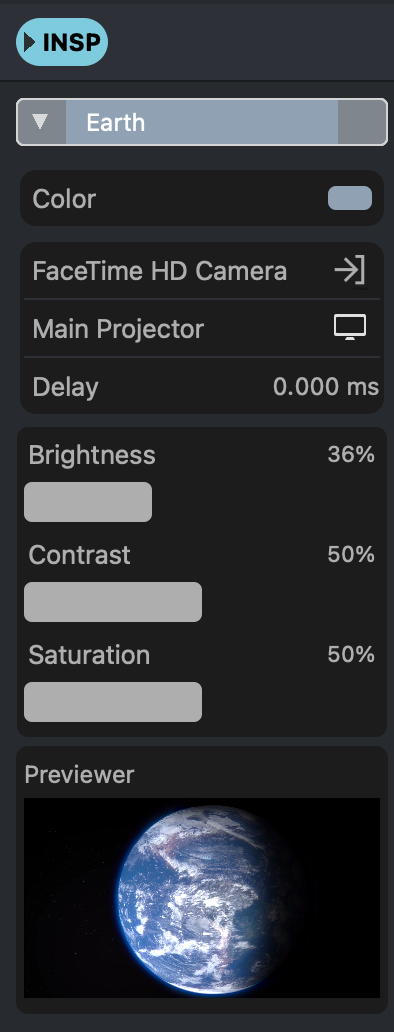
The Inspector provides several settings:
Track name
To change the Track name, double click on the Track name, enter the new name, and press Return.
Color
To change the Track color, click the color selector. A dialog appears where you can choose a new color.
Input
Select the video input device here. Click the black box to open a menu of available video devices.
Output
Select the video output device here. Click the associated black box to view a menu of available video devices.
Delay
Adds a delay to playback, in milliseconds.
Brightness
Adjusts the brightness level from 0% to 100%.
Contrast
Adjusts the contrast level from 0% to 100%.
Saturation
Adjusts the saturation level from 0% to 100%
Previewer
A real-time mini-monitor showing the current video output of the track.
Events

Video Events appear as regions without previews.
Editing
The sequencer’s editing tools, where applicable can be used to edit video, as they do with audio.
- Scissors: Split a video clip into additional clips.
- Selector: Select and shifting the timing of clips.
- Muter: Deactivate playback of a video clip.
- Eraser: Delete a clip.
- Fade Handles: Fade the video in/out.
Preview on Monitor Window
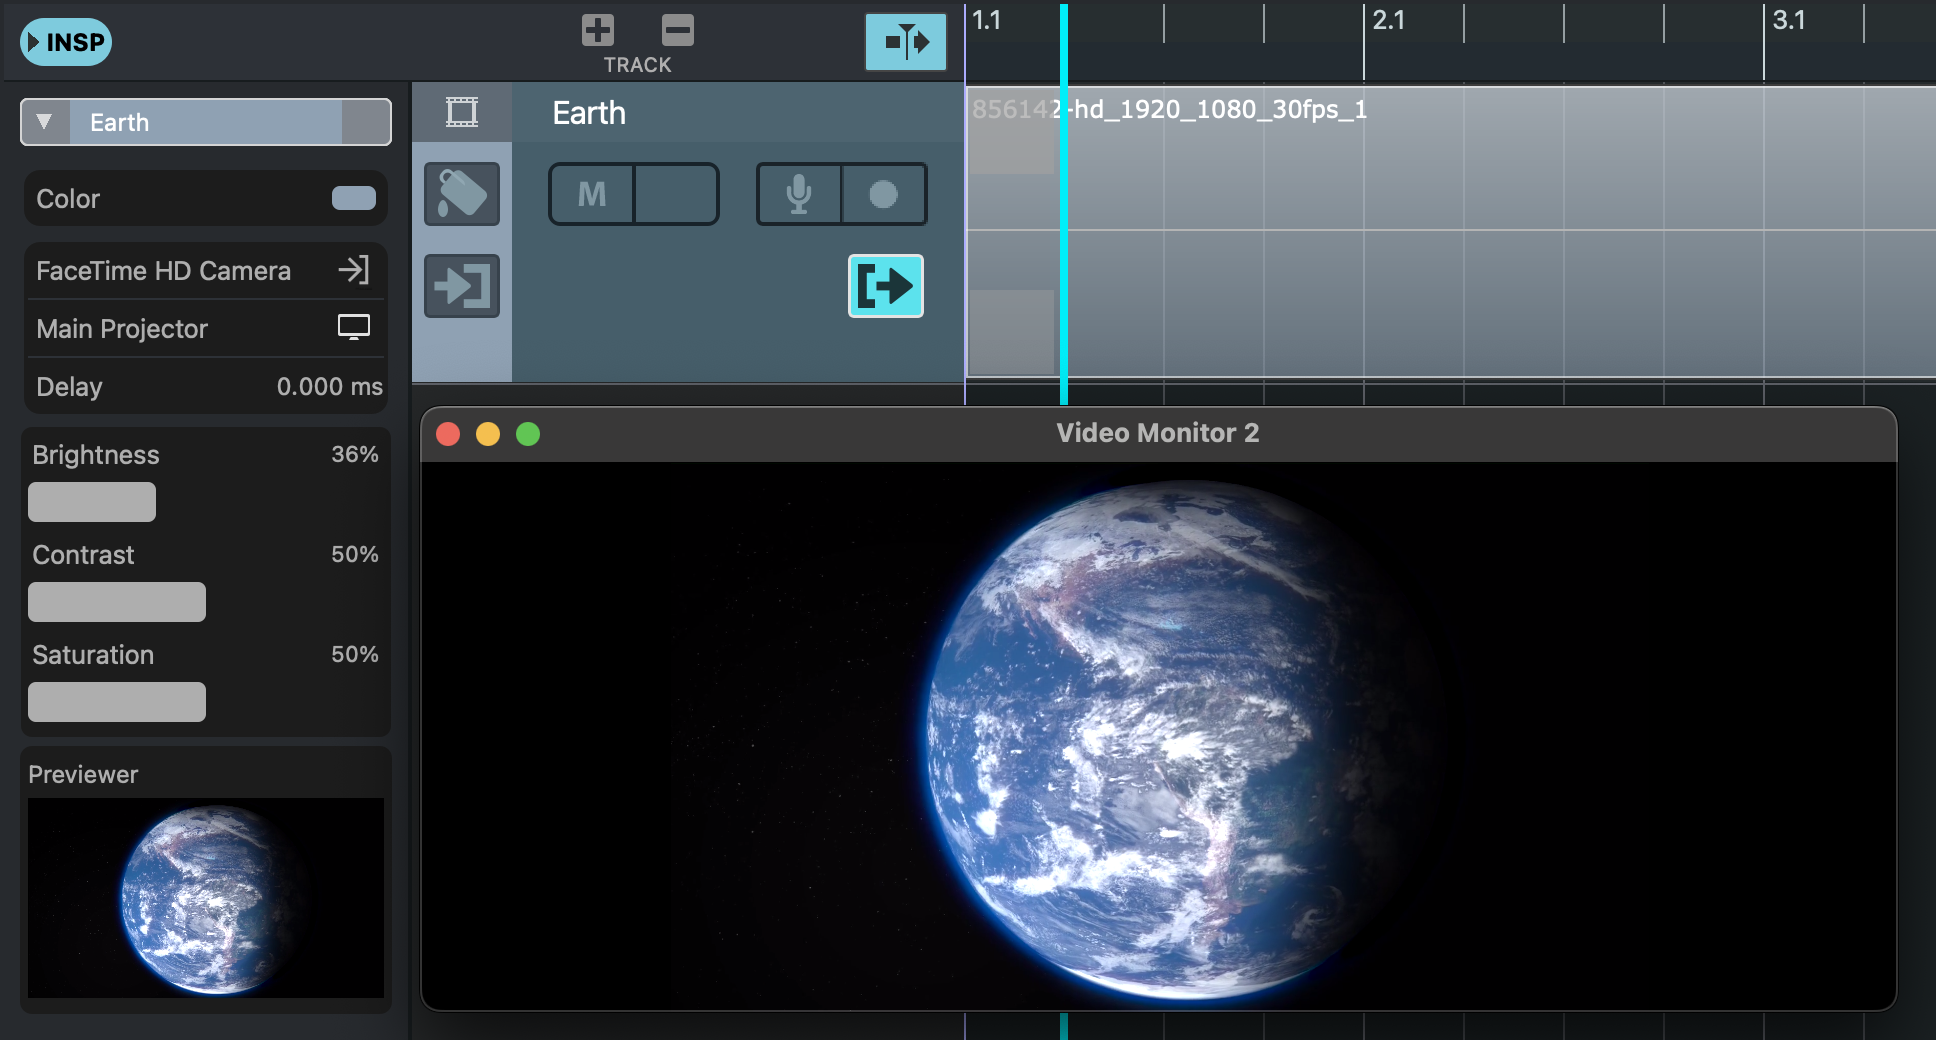
To open the previewer window, click the monitor icon in the track’s inspector.
Lyric 🔗

Lyric Tracks contain song lyrics.
For VST Live’s dedicated Lyric editor, see the Lyrics View.
Example Usage
Cue your singers on their mobile devices with real-time display of a Song’s lyrics.
Inspector Areas
There is one Area with two fields:
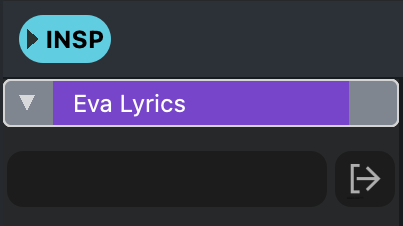
Track name
To change the Track name, double click on the Track name, enter the new name, and press Return.
Output
Select the output device to view the lyrics on. Click the associated black box to view a menu of available devices.
Events
Lyric events appear as separate regions for each time-stamped lyric.

Chord 🔗

You can use the Chord Track for adding chord Events to your Project.
For VST Live’s dedicated Chord editor, see the Chords View.
Example Usage
You and your band members can see the upcoming changes, with the current Chord in sync with the Song.
Inspector Areas
There is one Area with two fields
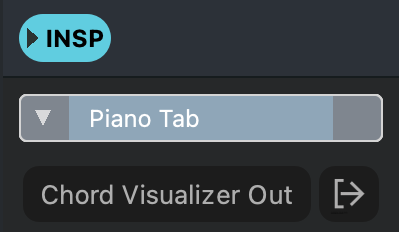
Track Name
To change the Track name, double click on the Track name, enter the new name, and press Return.
Output
Select the output device to view the Chords on. Click the associated black box to view a menu of available devices.
Events
Chord Events appear as separate regions for each Chord.

Sampler🔗

You can use Sampler Tracks for controlling the playback of audio samples via MIDI.
Example Usage🔗
Accompany your performance with Cubase-inspired sample editing. Slice and dice in advance so you set and forget while you play.
Inspector Elements
There are three Inspector Areas for Sampler Tracks: General, Velocity Curve and Fader:
General
Three are three fields for the General Area:
Track name
To change the Track name, double click on the Track name, enter the new name, and press Return.
Input
The Track’s input source. Click in the associated black box to view and select from a menu of available inputs.
Output
The Track’s output destination. Clicking in the black box produces a menu of available outputs to view and select from.
Channel
When set to channel number, all MIDI data is filtered out except data on the set channel. Set to “Any” to allow all MIDI data to pass.
Quantize
When active, the timing of incoming MIDI notes is nondestructively quantized. Click the associated black box to view a menu of available quantization values.
Transpose
A non-zero value transposes all incoming MIDI notes.
Velocity Curve
The velocity curve maps the velocity of incoming MIDI notes to the velocity they are recorded at on the Sampler Track. A straight line preserves the incoming velocities.
Fader
Sampler Tracks are supplied with faders, pan and mute/solo buttons.
Events
Sample Tracks contain MIDI notes. Unlike MIDI Tracks, the notes on a Sampler Track trigger the Track’s sampler (not a virtual instrument).
Editor
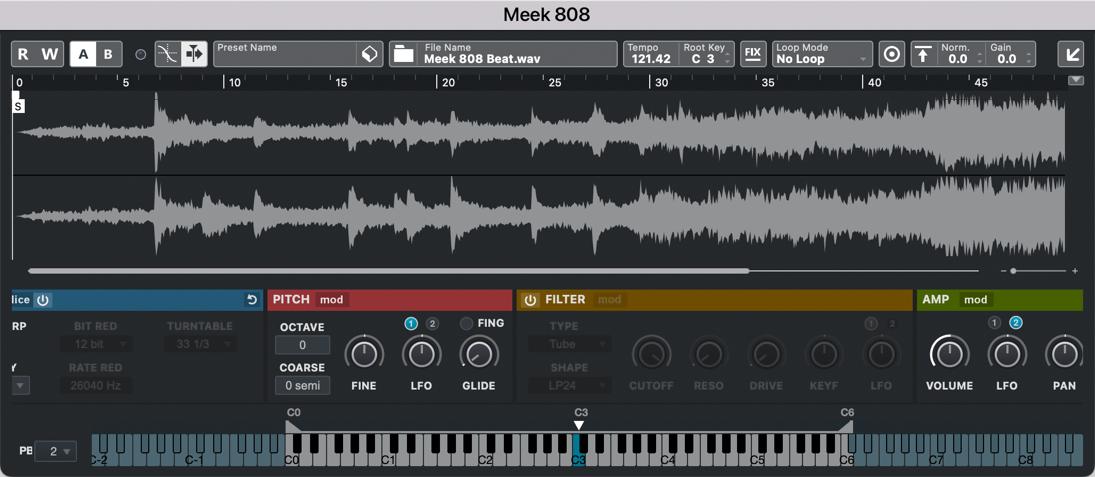
Sample Tracks contain their own internal editor. To access it, click the Sampler Track icon in the Inspector (to the right of the words, “Sampler Track”).
DMX🔗

DMX Tracks provide control of a single channel in a specific DMX Universe.
Overview
DMX is a networking protocol (USITT DMX512-A) that enables DMX compatible fixtures to be controlled from a universal DMX controller. DMX fixtures can be physical devices, such as PAR cans, or virtual devices such as those within VST Live’s Visualiser Module.
A DMX Universe contains 512 channels. The meaning of these channels is specific to the capabilities of a given DMX fixture. These capabilities are called personalities, and describe what channels control which capabilities of the fixture. For example:
- Simple fixture: One channel to control the fixture’s brightness.
- Complex fixture: Three channels to describe color (red, blue green), one to describe brightness, and two channels to describe aim (rotation and angle).
You assign DMX fixtures using their starting address. The fixture will then assign the following channels based on the number of parameters that it accepts control of. As the user, you are responsible for the knowledge each channel’s meaning, and where the address begins for the next fixture in your chain.
Place all of the DMX Tracks for each fixture in a folder. Name the folder based on the type of fixture, and its starting address. Within each folder, name your DMX Tracks based on the personalites they control.
Example Usage
Automate the lighting cues of your show; the lighting design for each Song will be synchronized to VST Live’s playback engine.
Inspector Areas
There is one Area with four fields:
Track Name
To change the Track name, double click on the Track name, enter the new name, and press Return.
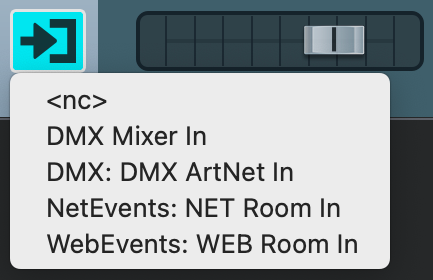
Input
- DMX Tracks have five available inputs:
- <nc>: No connection. (No input is sent to the Track.)
- DMX Mixer In: For recording fader movements from VST Live’s Mixer View.
- Art-Net: An industry-standard Art-Net (Ethernet) connection.
- NetRoom: The VST Live mobile application (Wi-Fi).
To set the DMX Track input, click on the associated black box to view and select from the menu.

Output
- DMX Tracks have six available outputs:
- Art-Net: For sending DMX commands to DMX hardware devices (e.g., dimmer packs).
- DMX Mixer Out: For sending fader movements to VST Live’s DMX DMX Mixer View.
- DMX Visualizer: Sends the output to the DMX panel of VST Live’s Visualizer Module.
- NetRoom: The VST Live mobile application (Wi-Fi).
- NetWeb: The VST Live mobile application (Internet).
To set the DMX Track output, click on the associated black box to view and select from the menu.
Universe
This parameter selects the destination Universe of your DMX channel.
For this parameter to function, your DMX interface(s) and DMX system must support and contain multiple DMX Universes.
Events
DMX Events appear as single elements, similar to MIDI notes. The color of each command matches the color assigned in the DMX Mixer (if used).

DMX Plugins
DMX Plugins allow you to non-destructively process DMX data in real-time.
Adding a DMX plugin
- Select your desired DMX Track.
- In the Track’s Inspector, open the DMX Inserts Inspector Area.
- Click the Plus Icon.
- Select your desired DMX plugin.
Removing a DMX Plugin
- Select your desired DMX Track.
- In the Track’s Inspector, open the DMX Inserts Inspector Area.
- Click on the DMX Insert.
- Select “<nc>”.
Openning a DMX Plugin
- Select your desired DMX Track.
- In the Track’s Inspector, open the DMX Inserts Inspector Area.
- Click the ‘e’ icon-button.
Toggling a DMX Plugin Bypass
- Select your desired DMX Track.
- In the Track’s Inspector, open the DMX Inserts Inspector Area.
- Click bypass-button (top-left). When the Plugin is bypassed, it will change to a dark colour.
Tempo🔗

Tempo Tracks allow you to add to, alter and remove tempo changes to a Song.
Example Usage
- Perform Songs with sections that accelerate and slow down.
- Play your studio tracks that have tempo changes, and have the Metronome module provide correct cues.
Inspector
There is one Inspector Area for Tempo Tracks. You can add, remove and modify tempo changes here.
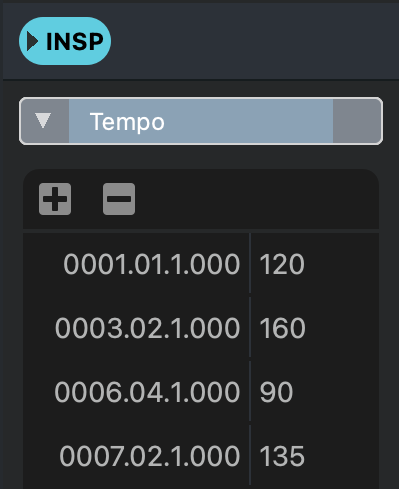
Tempo Map
The Tempo Track Inspector displays the Tempo Map for the Song you are editing. Each tempo change is a Tempo Event.
Add a Tempo Event
- Position the Playhead on the Timeline where/when you want the tempo change to occur.
-
Click the Plus icon button in the plus/minus button strip.

-
A dialogue box appears; type your desired tempo for this Event.
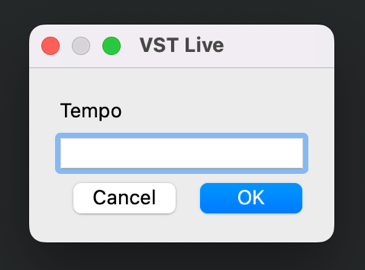
- Press RETURN.
Edit a Tempo Event
-
Depending on whether you want to change the start of the Event, or the tempo at that time, double-click on either the time or tempo.


- Type the new value.
- Press RETURN.
Remove a Tempo Event
- Select the Tempo Event you wish to remove by clicking on it in the Tempo Map.
- Click the Minus icon button in the plus/minus button strip
Events
Tempo Events appear as automation points on the timeline.

Time Signature🔗

The Time Signature Track allows you to create Time Signature Events—points on the Timeline where/when the Song’s time signature changes.
Example Usage
- Change to half or double-time without changing the song’s tempo.
- Play progressive rock.
Inspector
There is one Inspector Area for Time Signature Tracks. You can add, remove and modify time signature changes here.
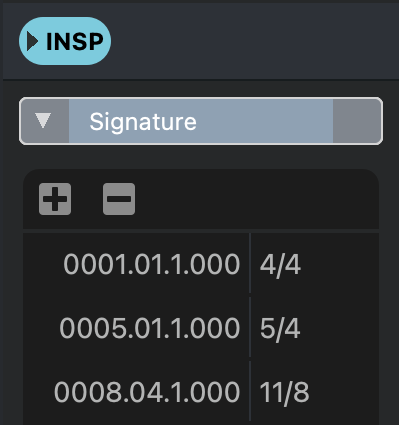
Time Signature Map
The Time Signature Track Inspector displays the Time Signature Map for the Song you are editing. Each Time Signature change is a Time Signature Event.
Add a Time Signature Event
- Position the Playhead on the Timeline where/when you want the time signature change to occur.
- Click the Plus icon button in the plus/minus button strip
- A dialogue box appears; type your desired time signature for this Event.
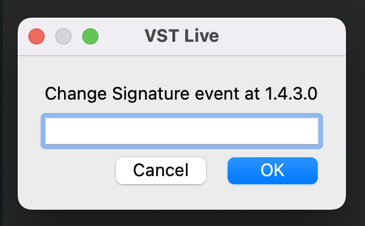
- Press RETURN.
Edit a Time Signature Event
-
Depending on whether you want to change the start of the Event, or the signature at that time, double-click on either the time or signature.


- Type the new value.
- Press RETURN.
Remove a Time Signature Event
- Select the Time Signature Event you wish to remove by clicking on it in the Time Signature Map.
- Click the Minus icon button in the plus/minus button strip
Events

Time Signature Events appear as automation points on the Timeline.
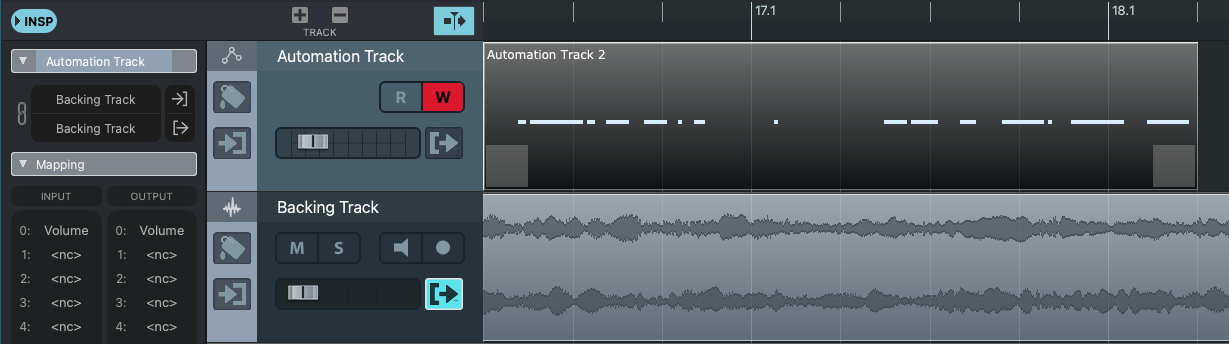
Automation🔗

The Automation Track provides a linear timeline of metadata for controlling parameters of your choice in VST Live.
Example Usage
- Automate parameters on a VST Plugin.
- Automate mixing.
Creating Automation Data
There are two ways to create Automation Data: Live recording and programming.
Live Recording
Recording live Automation Data means recording your movements of on-screen widgets (e.g., buttons, sliders and knobs). There are four areas within VST Live that you can do this:
- Layers
- Stacks
- Tracks
- The Mixer
Recording Live Automation Data
- Create a new Automation Track in the Tracks View.
- Open the top Automation Track Inspector.
- Select the Input Device (a Layer, Stack, Track, or Mixer element).
- Click the Edit Input Buss icon to open the interface for that device.
- Arm the Automation Track by clicking the red Write (‘W’) button in Track’s Header.
- Engage the Record button in the Transport.
- During recording, move any of the on-screen widgets for the input device you selected.
- Stop the Transport when you are finished recording.
Programming
Automation Data may be programmed manually on an automation track, as with MIDI and DMX data.
Programming Automation Data
- Create a new Automation Track in the Tracks View.
- Open the top Automation Track Inspector.
- Ensure the “Link Input and Output” button is deactivated.
- Using the Pencil Tool, draw a new Region on the Automation Track.
- Double-click the Region with the Arrow Tool to open the Region for editing in the Lower Zone.
- Using the Pencil Tool in the Lower, draw the automation data onto a data line.
Use the Line Tool as a shortcut for creating linear parameter changes.
Editing Automation Data
Automation Data may be edited after its creation (either by live recording or manual programming).
Editing
- Double-click the Region with the Arrow Tool to open the Region for editing in the Lower Zone.
- Use the Pencil, Eraser, and Line Tools to edit your data.
Assigning Automation Data Destinations
You can use the Automation Track to record widget movements, and play them back. Or, you can map the recorded movements to control other widgets in VST Live.
Choosing the Output Device
- Open the top Automation Track Inspector.
- Click the Output Device field to reveal a menu from which you can select your output device.
Remapping Parameters
Once you have selected input and output device, you can select the individual parameters to remap data to.
Remapping
- Select your Automation Track.
- Select In the Lower Inspector Area.
- Click on the first available Input Parameter (“<nc>”). You will see a map of available input parameters.
- Choose your desired Input Parameter from the menu.
- Click on the corresponding available Output Parameter (“<nc>”). You will see a map of available output parameters.
- Choose your desired Output Parameter from the menu.
You can also remap parameters in the Automation Track’s Lower Zone editor by clicking on a data line and selecting an output parameter to assign to the line.
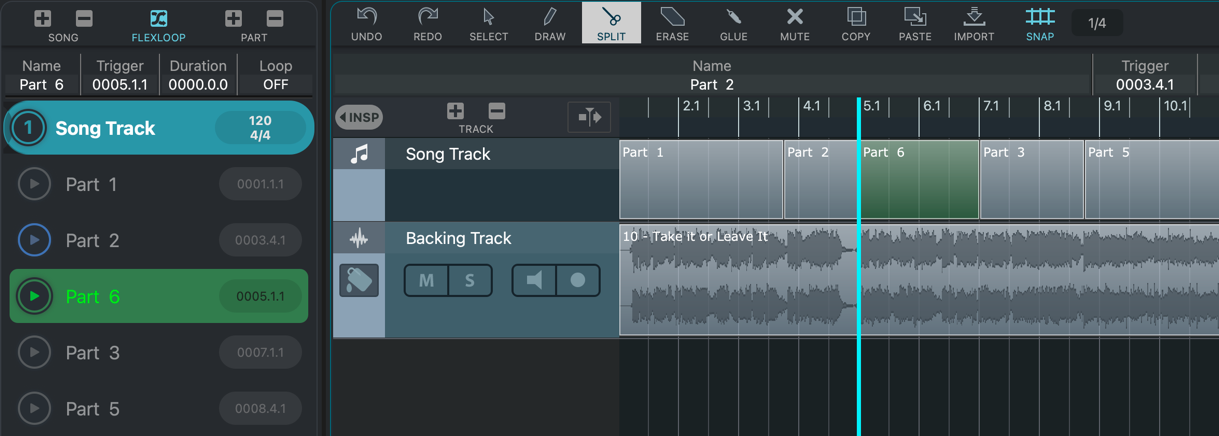
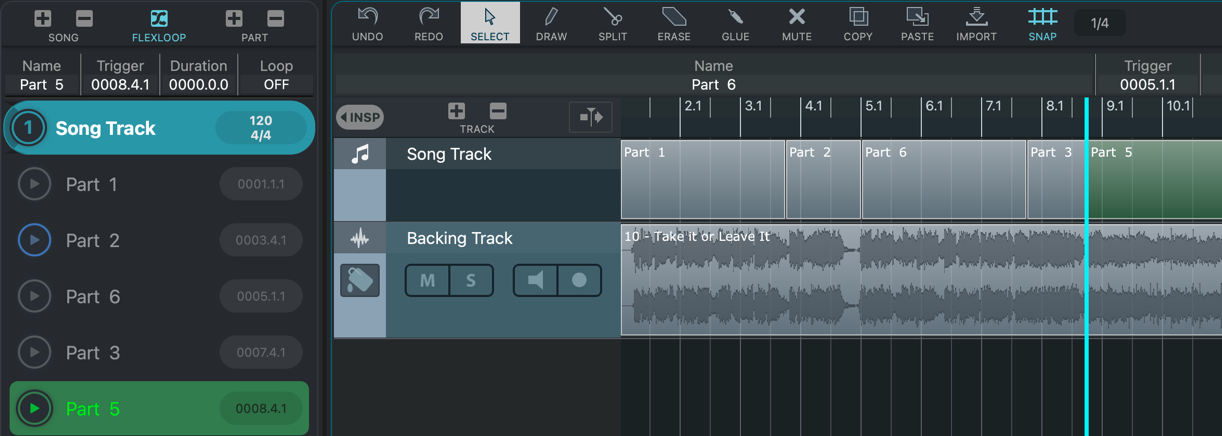
Song🔗

The Song Track provides a linear timeline of the Song’s Parts.
Example Usage
- Visualise the timing of VST Live Tracks with Song Parts.
- Adjust the duration of Song Parts.
- Split existing Song Parts into new Parts.
Operations
Editing Part based on visual timing criteria provides an alternate method of the Left Zone interface.
Part Renaming
When a Part is selected on a Song Track, the name can be modified in the Track Zone header.

- Select the Part with the Selection tool.
- Click in the Name field of the Track Zone header.
- Type the new name.
- Press RETURN.
Part Resizing
Parts can be resized visually.

- Select the Part with the Selection tool.
- Position the cursor on the dividing line between two Parts on the Song Track. The cursor will change shape to a glyph of two arrows.
- Drag the dividing line to your desired position
Part Splitting
Parts can be split, visually.
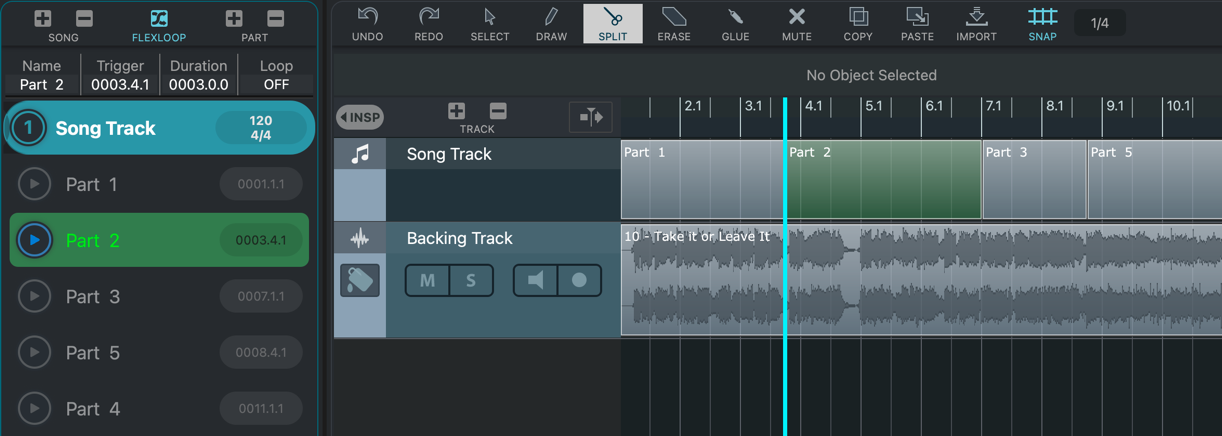
- Select the Scissors tool.
- Position the cursor at the place you wish to split the Part.
- Click the mouse (or touch-point).