Conductors🔗
Conductor modules provide real-time meta-data about your performance. To put it another way, Conductors give you feedback on the performance itself, instead of the artistic content.
- There are three Conductors in VST Live:
- Metronome
- Audience
- Notes
Metronome 🔗
The Metronome supplies a timing cue during your performance.
Visualisation🔗
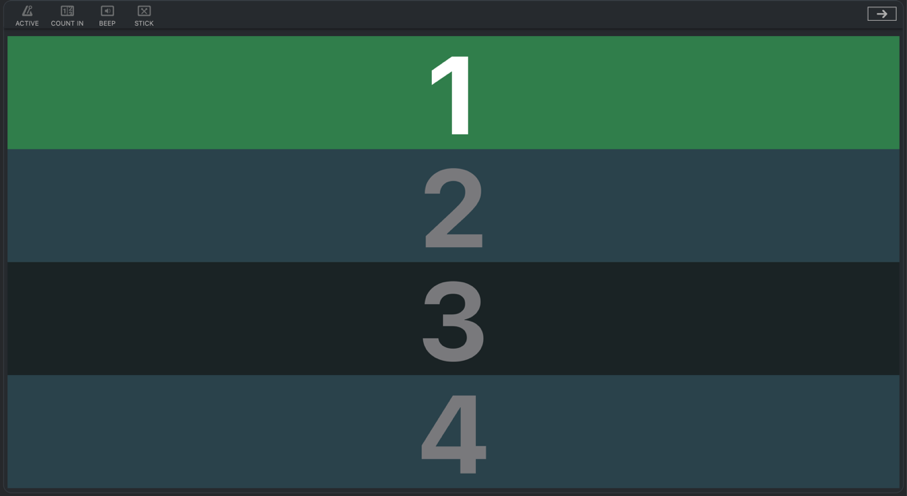
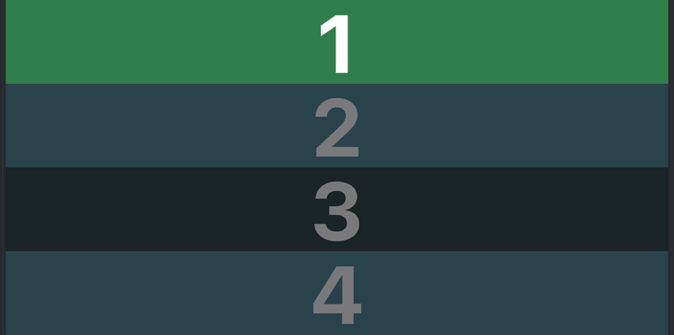
When used as a playback visualizer (e.g., to cue you while performing a Song), the horizontal panels of the Metronome View will change color to indicate the progression of the beat. The number of panels is equal to the number of beats (based on the Song’s Time Signature).
- Dark Blue: Downbeat.
- Light Blue: Upbeat.
- Green: Current beat.
Time Signature Changes🔗
If a Song contains time signature changes, the number of counting (vertical) steps in the Metronome will change in real-time. This functionality manifests in both the desktop version of VST Live and the mobile app.
Toolbar🔗
The Toolbar provides indicators and options:

- Active Indicator
If illuminated, the Metronome is active. (This is the same control as in the Transport Panel).
- To toggle the Metronome between active and inactive, click this icon button.
- Recording Count-In Setting
If illuminated, the Transport will perform a count-down before engaging the Playhead for recording.
- To toggle the count-in between active and inactive, click this icon.
- Count-In Duration
This display shows the duration of the count-In. (The count-In option must be active for the count-In to occur.)
- To change the count-in duration, click the associated grey oval, and select from 1-4 bars.
- “Beep” Soundset
If illuminated, the soundset used for the Metronome clicks will be based on traditional beeps.
- To toggle the soundset between “Beep” and “Stick”, click this icon. (If “Beep” is inactive, the “Stick” soundset is automatically activated.)
- “Stick” Soundset
If illuminated, the soundset used for the Metronome clicks will be based on drumsticks clicking together.
- To toggle the soundset between “Stick” and “Beep”, click this icon. (If “Stick” is inactive, the “Beep” soundset is automatically activated.)
- Pre-roll Setting
Normally, when you engage the Transport, playback begins where the Playback Head is currently positioned on the Timeline. Pre-roll is an option is to begin playback shortly before the Playback Head’s current position.
- To toggle pre-roll between active and inactive, click this icon button.
- Pre-roll Duration
The Pre-roll’s duration may be adjusted.
- To change the count-in duration, click the associated grey oval, and select the desired value.
- Pre-Roll Duration Unit
The Pre-Roll duration can be specified according to tempo or elapsed time.
- To toggle the Pre-Roll duration unit, click in the associated, small-grey circle.
Mixer Channel🔗

When the Metronome is active, it appears as a yellow channel in the Mixer called “Metro”.
If the Metronome is not active, the Metronome channel will not appear in the Mixer.
Audience🔗
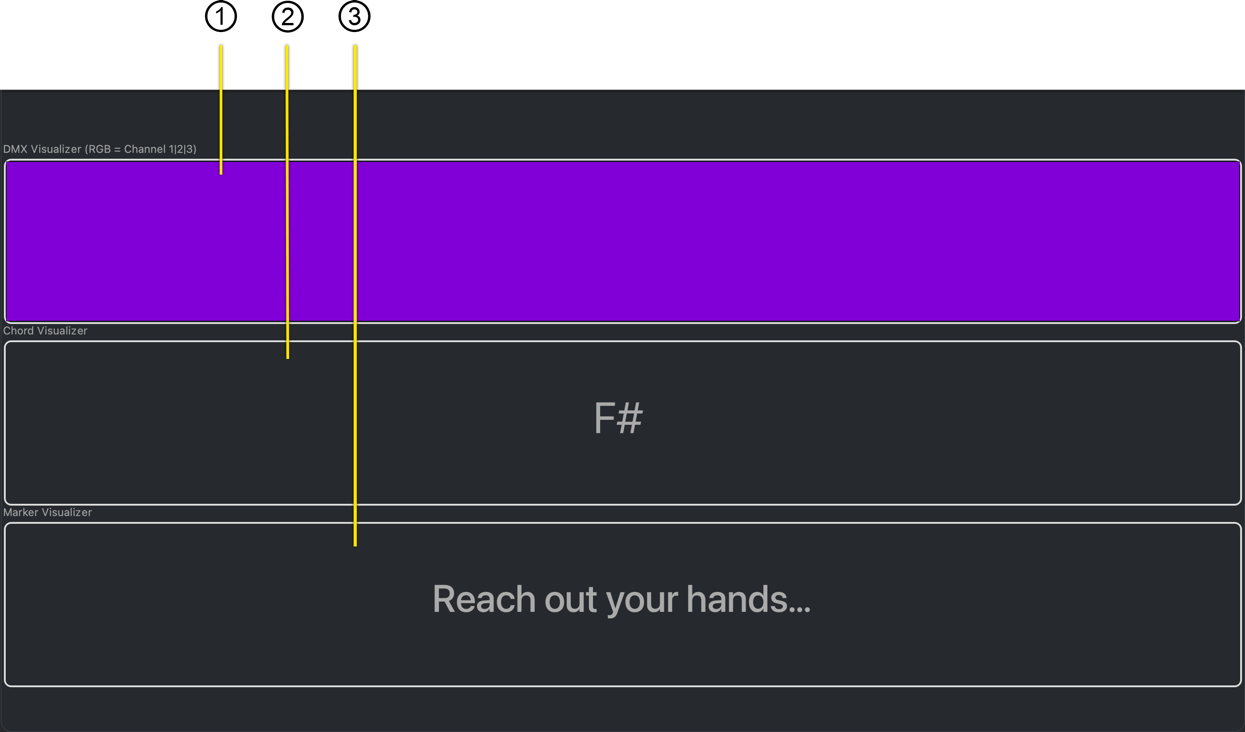
The Audience View brings together three performance visualizations simultaneously on one screen. It provides an overview of your performance in real-time, allowing you to monitor it as a whole.
Panels🔗
Each of the three windows visualizes a different VST Live View, synchronized to the Transport.
DMX🔗
A preview (color) of the DMX lighting sequence.
Chords🔗
The active chord from a Chord Track.
Lyrics🔗
The active lyrics from a Lyric Track.
Notes🔗
Notes are a writing scratch pad for each Song. Unlike other Modules, this Module is static (by design). The information you write in Notes cannot change while a Song plays.
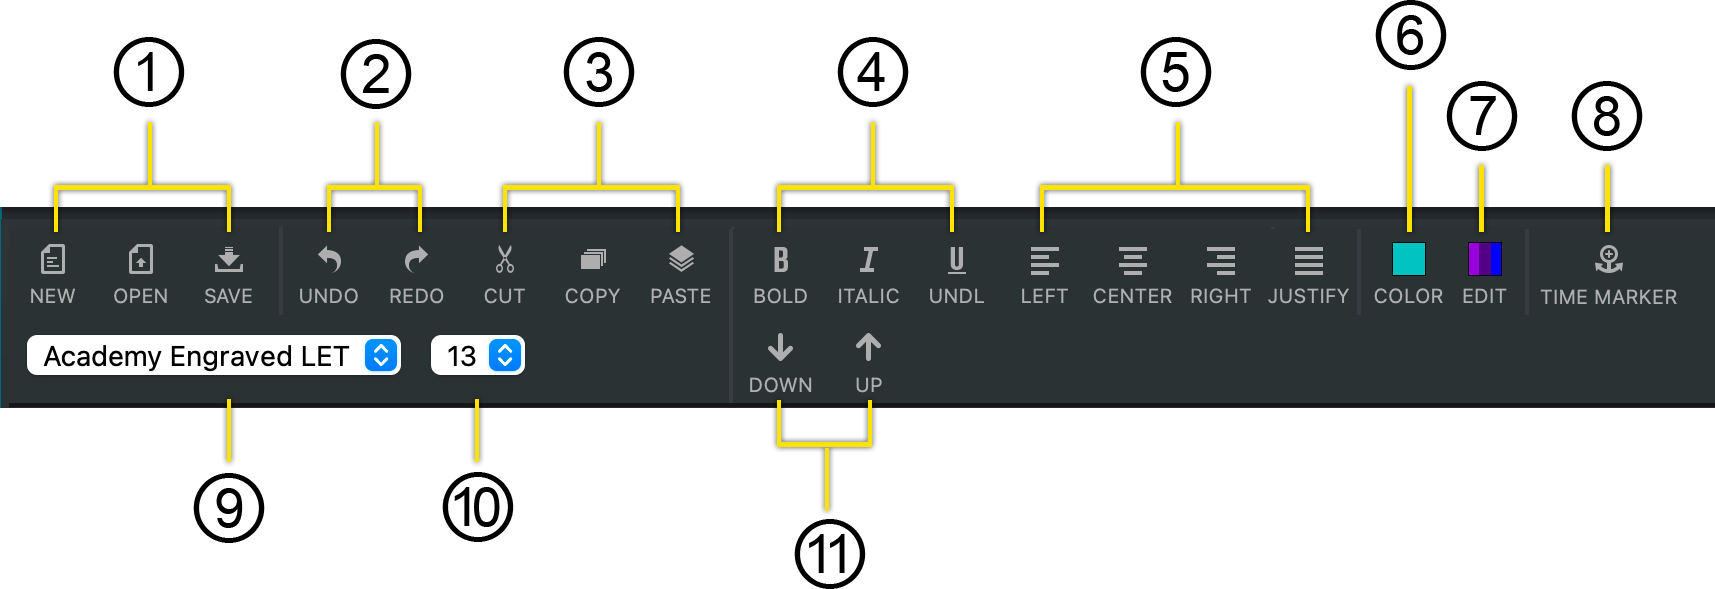
Interface🔗
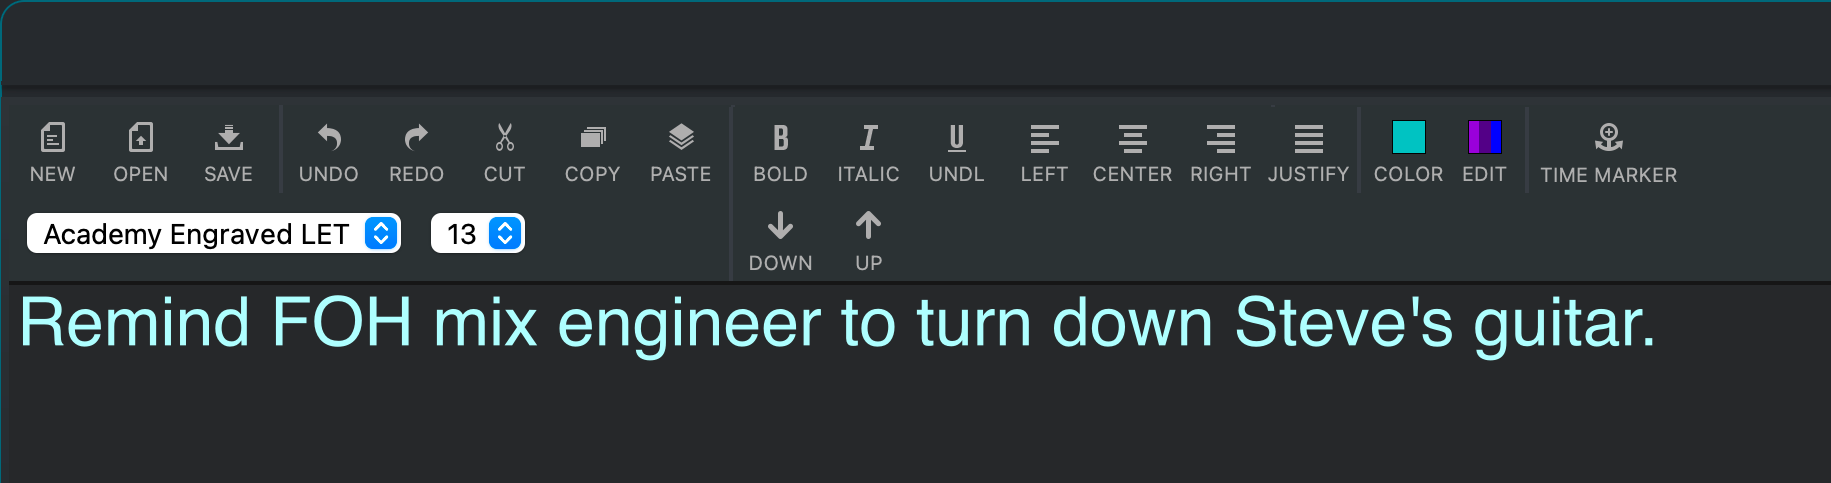
- Document Operations
- Create a new Notes document. (There can be only one for each Song.)
- Open an existing Notes document.
- Save the current Notes document.
- Undo and Redo
The Notes View has its own history buffer.
- Non-Selected Layer
Use cut, copy and paste for rich text editing.
- Typographic Style
Choose your typographic style.
- Paragraph Justification
Choose you paragraph justification.
- Apply Text Color
🔗
To color a section of text:
- Highlight the desired text.
- Click the icon’s button. (The text will be colored according to what is displayed in the icon button.)
- Set Text Color
Click this icon button to set the color used by the Text Color icon button.
- Insert Page Break Markup
This button will insert the markup text to create a time delay.
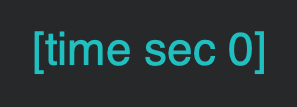
Replace the ‘0’ with the number of seconds you wish before the Notes display is cleared. The next set of Notes will be displayed at the top of the window.
During playback of the Transport, the page break markup will disappear.
- Set Font Face
Set the font face for selected text.
- Set Font Size
Set the font size for the selected text.
- Manual Page Break Navigation
Manually scroll through the Notes Page Breaks.
Playback Visualisation🔗
Notes can be used to cue you or other personnel during a performance.
- To use Notes for jotting down ideas and other comments, use a smaller font.
- To use Notes for cueing during live performance, use a larger font.